How to Assemble Halo
 Step 1
Partially screw in two included ‘A’ screws into the Junction Box on your ceiling. Make sure to only screw them in about half way. 
 Step 2
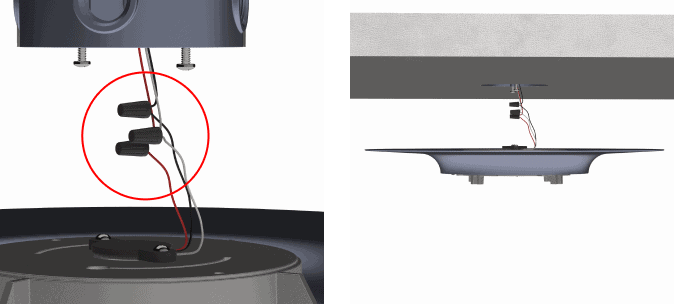
Connect the wires on the back of the Ceiling Cover to the wires in the Junction Box on your Ceiling.

 Step 3
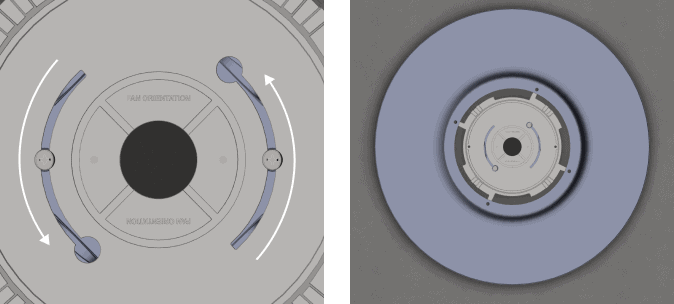
a) Align the two holes on the Ceiling Cover to the half screwed in screws on the Junction Box. Then, rotate the Ceiling Cover to align the ‘Fan Orientation’ lines.
b) Try to point each of the four lines to the center of the four walls in your room. These lines represent where the 4 pipes of Halo will be once it is all set up.
Now, tighten the screws to hold everything in place.

 Step 4
Line up the green arrow sticker on the Frame with the green arrow sticker on the Ceiling Cover. Push them together and rotate the Frame clockwise. Make sure to rotate it until the red arrow on the Frame lines up to the red arrow on the Ceiling Cover.
Use the included ‘B’ screw to screw the Frame and Ceiling Cover together.

 Step 5
Connect the Ring to the Frame by lining up the green arrow stickers. Just like in the last step, push up and rotate clockwise until the two red arrows line up.

 Step 6
Place the included ‘Locker’ into the notched area, indicated by the blue arrow on the Frame.

 Step 7
There are two wires connected to the Ring. One short wire and one long wire.
a) Take the short wire and connect it to the wires coming out of the motor in the Frame.
b) Take the long wire and connect it to the wires coming out of the Ceiling Cover.
Be sure to run the wires under the frame instead of over the frame. Also, ensure the wires are matched by color when connecting. This means the two red wires align with each other when connected.

 Step 8
Take the 2 Frame Panels and line them up on the Frame. Now, use the included ‘C’ screws to screw the Frame Panels in place.
Remove the stickers and Halo is ready for use!

 Step 1
Partially screw in two included ‘A’ screws into the Junction Box on your ceiling. Make sure to only screw them in about half way.

 Step 2
Connect the wires on the back of the Ceiling Cover to the wires in the Junction Box on your Ceiling. 
 Step 3
a) Align the two holes on the Ceiling Cover to the half screwed in screws on the Junction Box. Then, rotate the Ceiling Cover to align the ‘Fan Orientation’ lines.
b) Try to point each of the four lines to the center of the four walls in your room. These lines represent where the 4 pipes of Halo will be once it is all set up.
Now, tighten the screws to hold everything in place.

 Step 4
Line up the green arrow sticker on the Frame with the green arrow sticker on the Ceiling Cover. Push them together and rotate the Frame clockwise. Make sure to rotate it until the red arrow on the Frame lines up to the red arrow on the Ceiling Cover.
Use the included ‘B’ screw to screw the Frame and Ceiling Cover together.

 Step 5
Connect the Ring to the Frame by lining up the green arrow stickers. Just like in the last step, push up and rotate clockwise until the two red arrows line up.
Use the included ‘B’ screw to screw the Frame and Ceiling Cover together.

 Step 6
Place the included ‘Locker’ into the notched area, indicated by the blue arrow on the Frame.

 Step 7
There are two wires connected to the Ring. One short wire and one long wire.
a) Take the short wire and connect it to the wires coming out of the motor in the Frame.
b) Take the long wire and connect it to the wires coming out of the Ceiling Cover.
Be sure to run the wires under the frame instead of over the frame. Also, ensure the wires are matched by color when connecting. This means the two red wires align with each other when connected.

 Step 8
Take the 2 Frame Panels and line them up on the Frame. Now, use the included ‘C’ screws to screw the Frame Panels in place.
Remove the stickers and Halo is ready for use!

How to Connect Halo To Your Phone

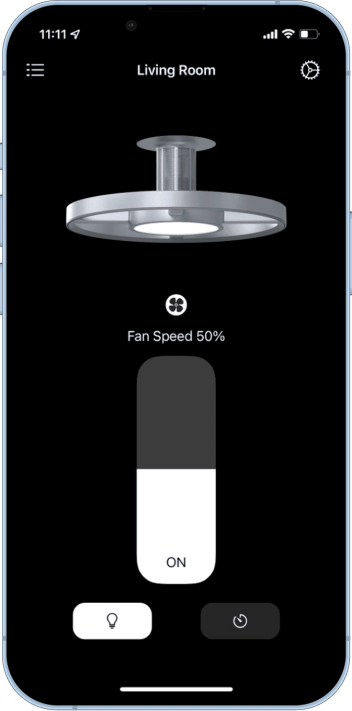
Download the Carbon Technologies app from the App Store.
Use the included remote to press and hold the Plus and Power buttons for 10 seconds.
Make sure you’re connected to the Wifi. Open the app, press ‘Add New Device’ and wait 30 seconds.
- Make sure that Halo is plugged in correctly
- Ceiling Junction Boxes are usually connected to a light switch for power. Make sure that this light switch is on, so that Halo can turn on.
- Make sure that the Wifi Network is 2.4Ghz
- Try reseting Halo and reconnect
- If Halo still has trouble connecting, contact Support
Halo is not connected to your WiFi and can be used while you’re on the same WiFi network
